

How To Create An Embossed Effect In Illustrator
In the following Adobe Illustrator tutorial you will learn to create a quick embossed dynamic text effect using only the Appearance Panel in order to save it as a Graphic Style!
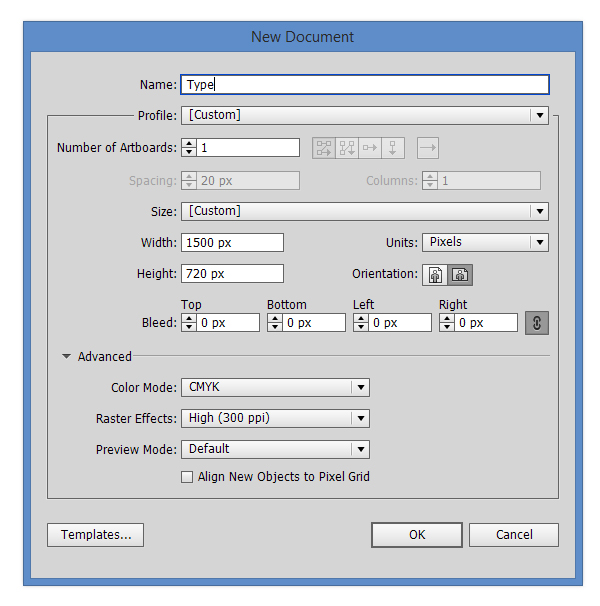
1. Open Adobe Illustrator and create a new 1500 x 720px document (Ctrl + N). Select CMYK Color Mode, 300 PPI Raster Effects and make sure that Align New Objects to Pixel Grid is unchecked.
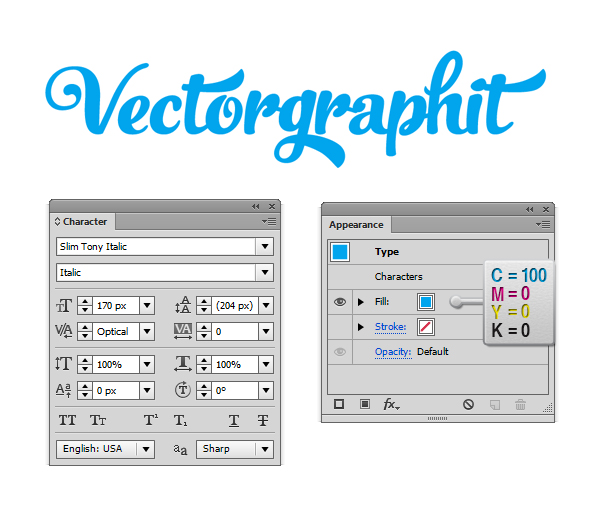
2. Pick theType Tool (T) and write the wordVectorgraphit as you see in the image below.Set the font toSlim Tony Italic, thesize to 170 px and the color toC=100 M=0 Y=0 K=0.
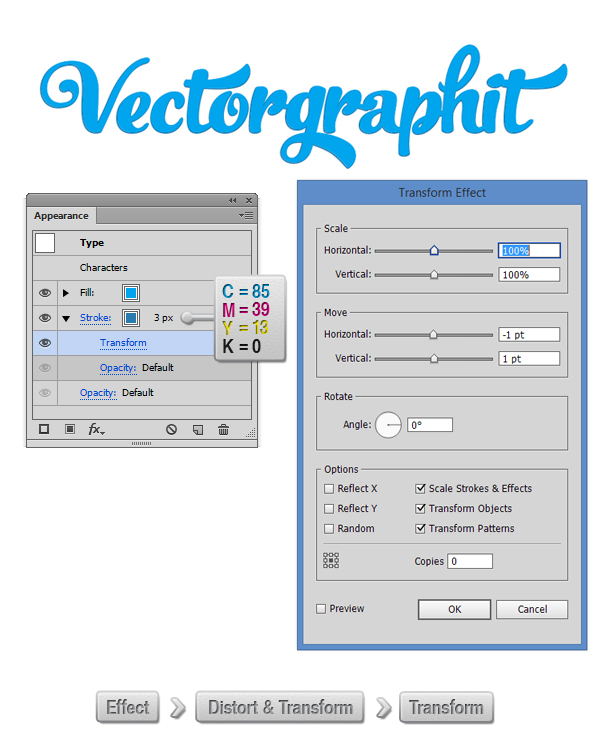
3. From the Stroke panel (Window > Stroke) add a 3px stroke and set the colour to C=85 M=39 Y=13 K=0.Now select the stroke from the Appearance Panelthen go to Effects > Distort&Transform > Transfrom and in the dialog box enter a value of -1px for Horizontaland1px for Vertical.
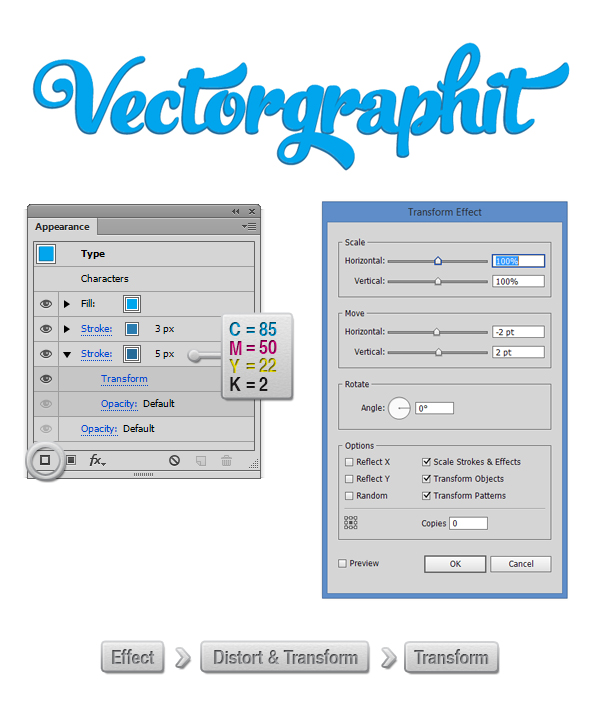
4. From the Appearance Panel add a new stroke with a 5px width. Set it's colour toC=85 M=50 Y=22 K=2. Now select the stroke from theAppearance Panelthen go toEffects > Distort&Transform > Transfromand in the dialog box enter a value of-2px for Horizontaland 2px for Vertical.
5. Again from the Appearance Panelselect the Fill and add an Inner Shadow (Effects > Stylize > Inner Shadow).Change the colour to Black, lower the opacity to 15% and set the blending mode to Multiply. Also set the blur to 15pxthe hit the ok button.

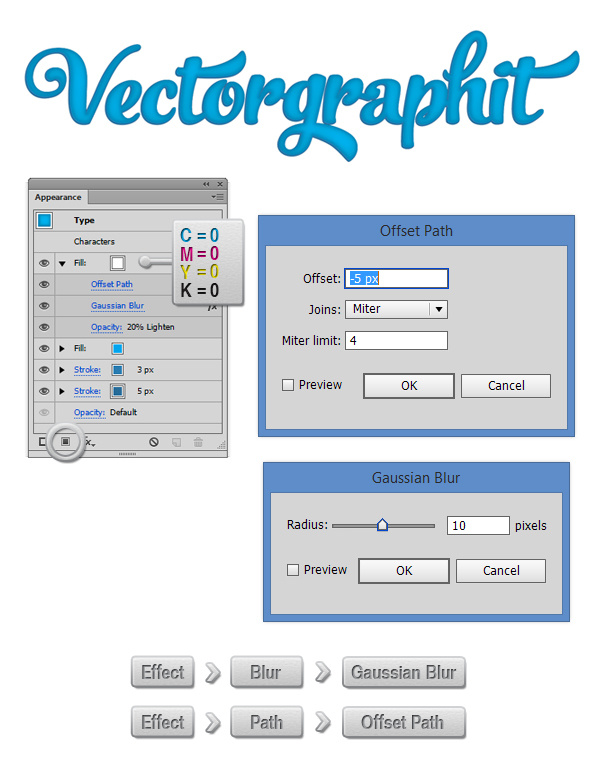
6. Add a new White fill from the Appearance Panel.With the fill selected go to Effect > Path > Offset Path and enter a value of -5px. With the fill still selected go to Effect > Blur > Gaussian Blur and enter a velue of 10px in the dialog box. From the Transparency Panel lower the opacity to 20% and set the Blending mode to Lighten.
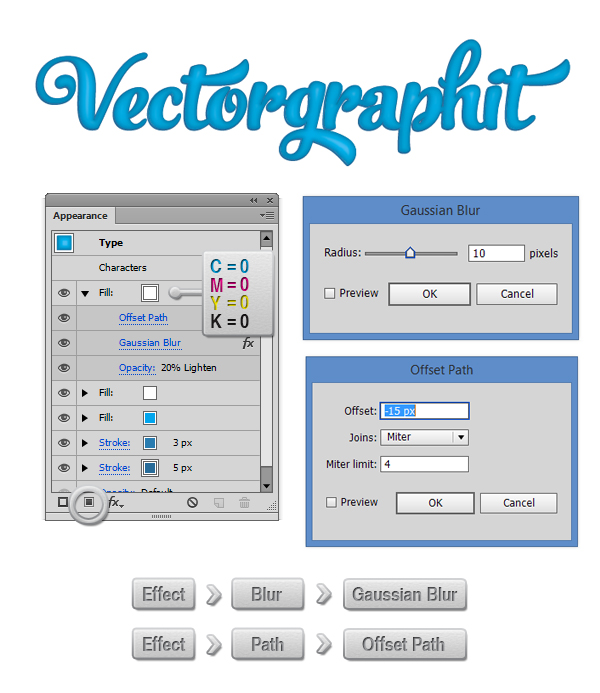
7. Again from the Appearance Panel add a third Fill (White). With the fill selected go toEffect > Path > Offset Path and enter a value of-10px. With the fill still selected go toEffect > Blur > Gaussian Blur and enter a velue of 10px in the dialog box. From theTransparency Panel lower the opacity to20% and set theBlending mode toLighten.
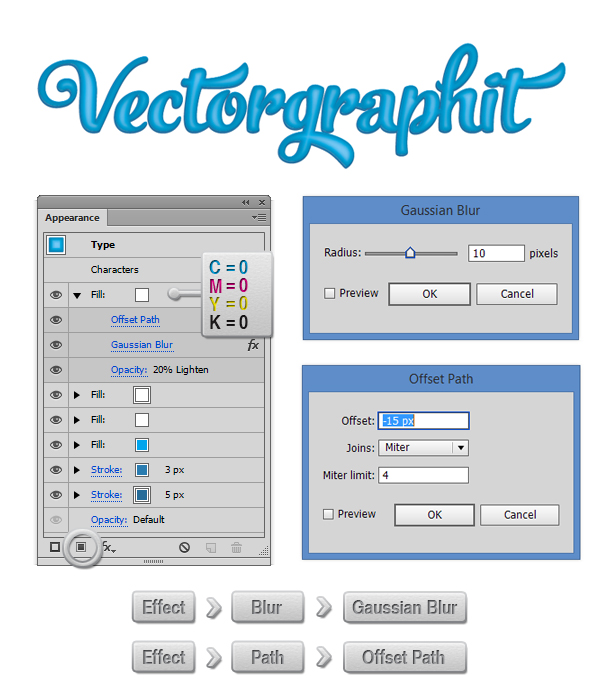
8. Again from the Appearance Panel add the last Fill (White). With the fill selected go toEffect > Path > Offset Path and enter a value of-15px. With the fill still selected go toEffect > Blur > Gaussian Blur and enter a velue of10px in the dialog box. From theTransparency Panel lower the opacity to20% and set theBlending mode toLighten.
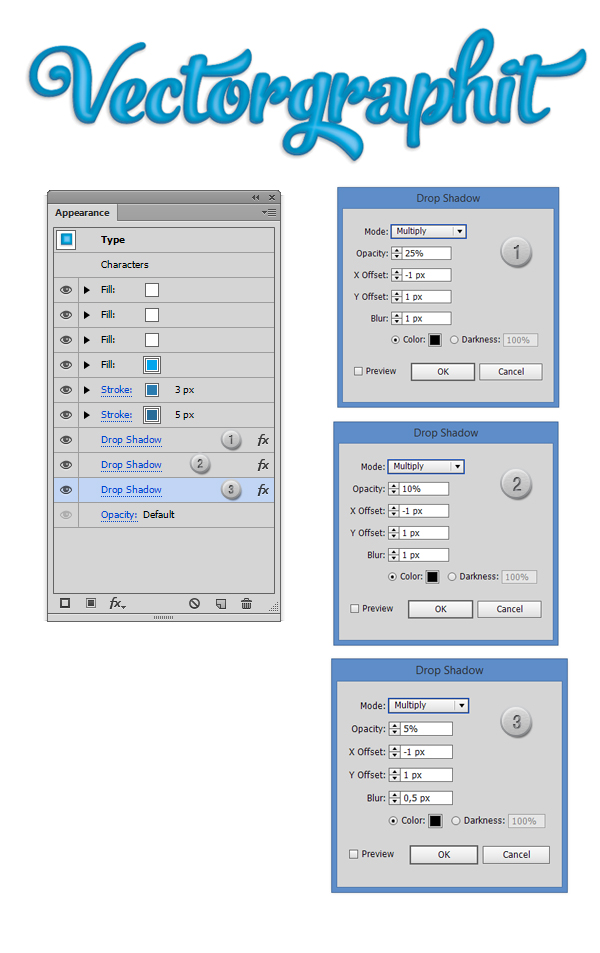
9. With the type selected (not only the fill or the stroke) add three Drop Shadows (Effect > Stylize > Drop Shadow). Make sure to enter the values as in the screenshot below. When you add a new Drop Shadow when you already have one Illustrator will say "hey you already have a drop shadow", just enter the "Apply new Efect" button.
10. Now pick the Rectangle Tool (M) and draw a 1500 x 720px rectangle (as big as the artboad). Fill it with C=20 M=0 Y=0 K=0.
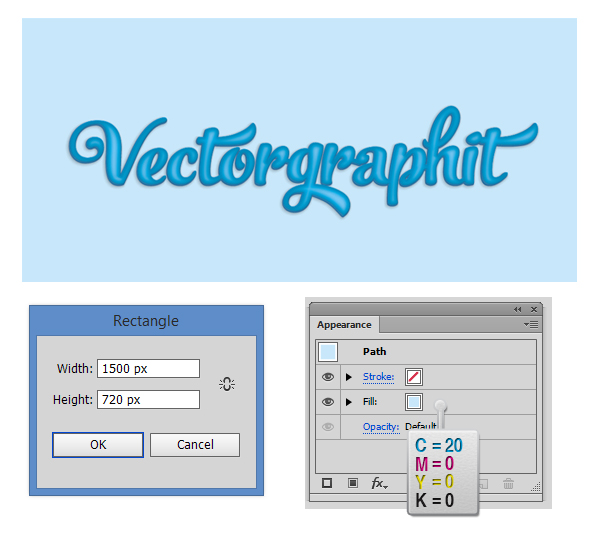
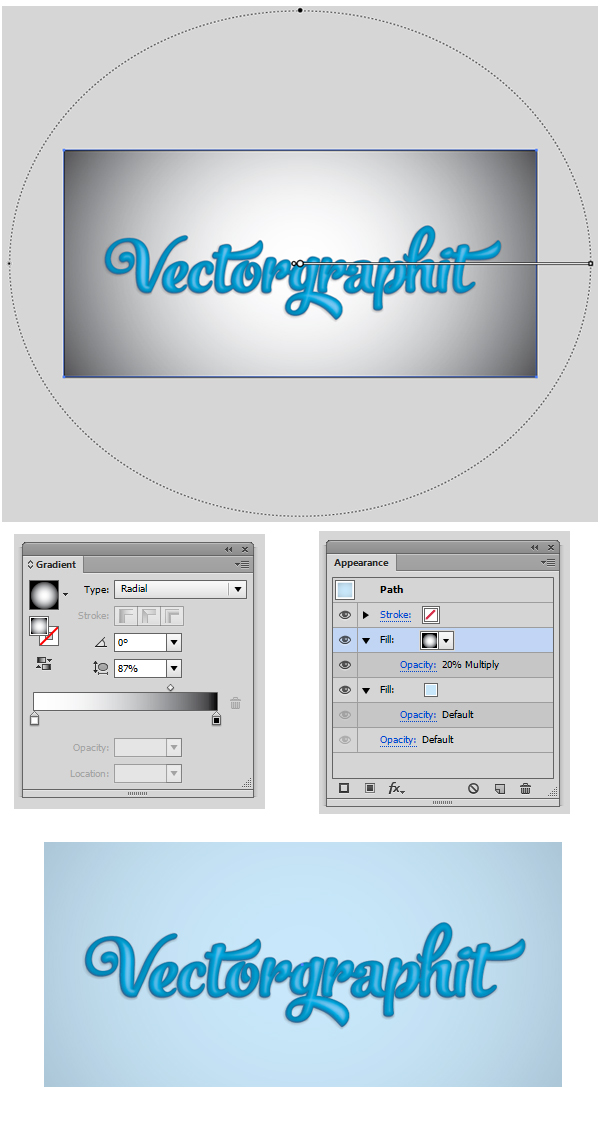
11. Add a new Black and White gradient fill from the Appearance Panel. With the fill selected go to the Transparency panel and lower the opacity to 20% and set the blending mode to Multiply.
17. Add a last fill ad set the colour to C=20 M=0 Y=0 K=0. Now with the fill still selected go to Effect > Sketch > Note Paper and enter the same values as in the image below.

18. Here is the result of our work:

Did you enjoy this tutorial? If you want to see my work, you can find me on Behance. Thanks!
How To Create An Embossed Effect In Illustrator
Source: https://www.vectorgraphit.com/how-to-create-a-quick-embossed-text-effect/amp
Posted by: kerbereaceforehis.blogspot.com
0 Response to "How To Create An Embossed Effect In Illustrator"
Post a Comment